On previous post we learned how to subscribe to a Filter and get a list of items that meet the condition by email, on this post we will learn about the options to manage the subscription
Why we need to manage subscriptions to Filter?
As per my experiences, manage Jira filter subscriptions is important to control the automatic delivery of scheduled emails containing information of projects and to prevent email overload or system issues, also by managing subscription we ensure that users receive relevant updates, also Atlassian recommend that by managing subscriptions administrators can maintain a clean and efficient Jira environment. Managing subscriptions allows you to modify their schedule, recipients, and included issues, and to delete unnecessary or duplicate subscriptions that can negatively impact system performance and user experience.
Key reason to manage Filters subscriptions
- Prevent email overload: Users can get overwhelmed by too many or irrelevant emails, reducing the value of the subscription service.
- Improve system performance: An excessive number of subscriptions can strain Jira’s resources, leading to slower performance for everyone.
- Ensure relevance: Managing subscriptions allows you to tailor the emailed content to specific needs, such as critical issues or team progress, ensuring that recipients see only what matters to them.
- Maintain efficiency: By removing outdated or duplicate subscriptions, you keep the system tidy and ensure that the most useful filters and their associated subscriptions are still active.
- Control access: You can ensure that only authorized users receive specific updates by managing who is subscribed to each filter and its results.
What can be manage?
- Schedule: You can change the frequency of the emails, setting them for daily, weekly, or custom schedules.
- Recipients: You can add or remove users and groups from the subscription list.
- Filter criteria: You can modify the underlying JQL or basic search query of the filter to change the type of issues that are reported, according to Atlassian.
- Subscription status: You can activate or deactivate a subscription if needed.
- Deletion: You can delete subscriptions that are no longer needed, which helps keep your environment clean and efficient
ok, follow me with the next step to learn how to manage subscriptions
Open de Subscription Manager
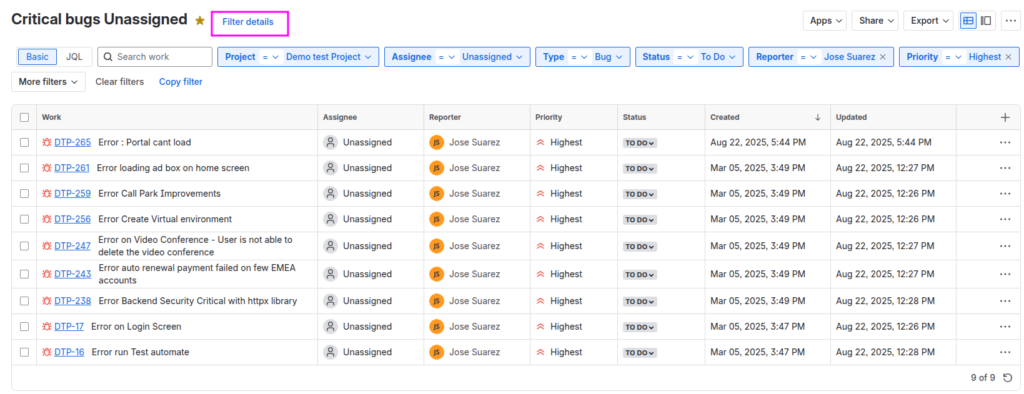
As per last post, we had this Filter, so click on the Filter details
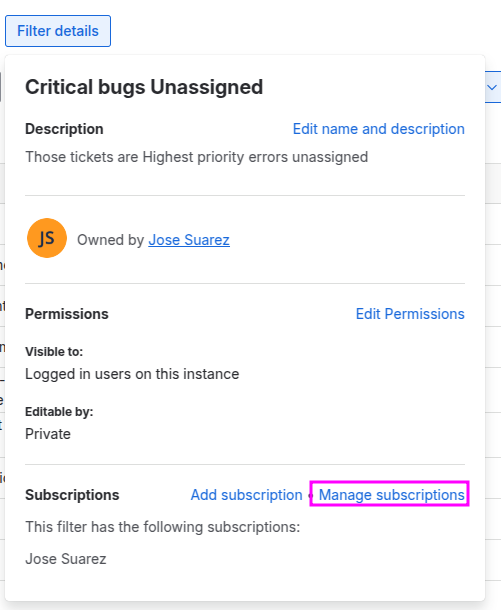
by doing that , should open the Screen details of the Subscription, then click on Manage Subscriptions
By this, you will see the Manage screen of the Subscription

the actions available are Edit , Delete and Run now
Edit Subscription
This option let us to modify the current Subscription
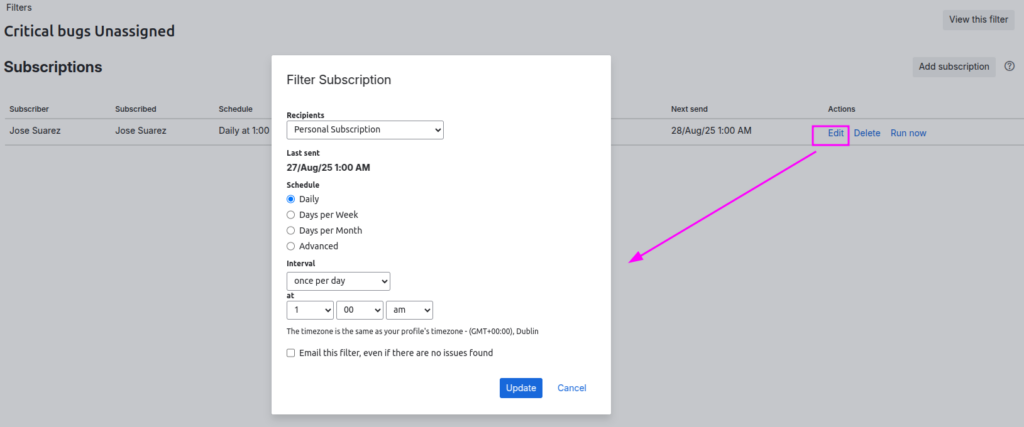
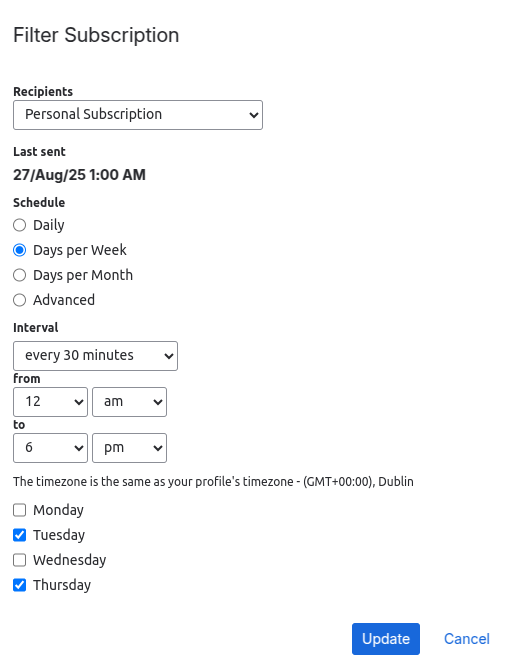
Will modify it, by changing the options below, the click on Update
Delete Subscription
Deleting a filter automatically deletes its subscriptions, so if you want to keep the filter, use the subscription management option.
The owner of a private filter can delete it. If you don’t see the option to delete a filter or subscription, you may not have the necessary permissions.

Run now Subscription
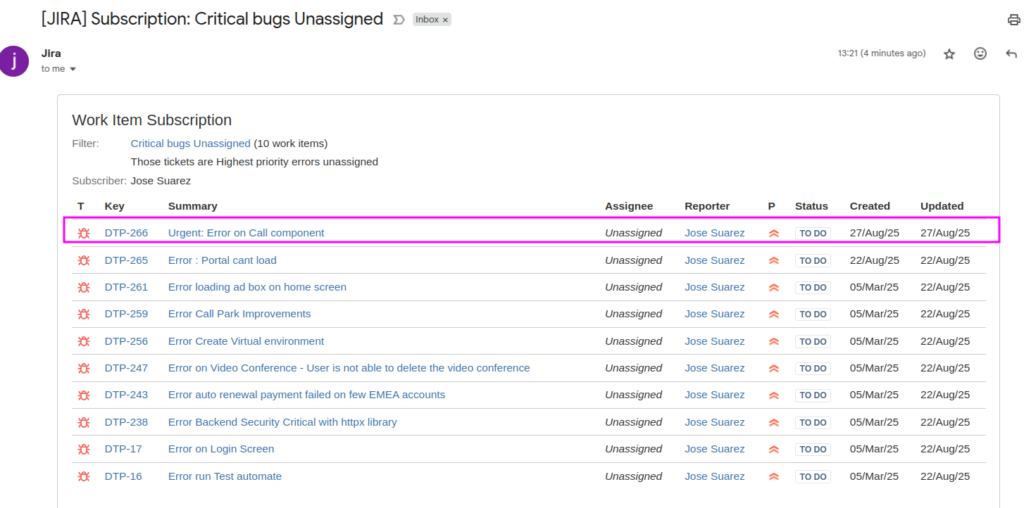
By this option you can test your subscription and verify if the content is what expected, before leave it run as schedule, also you can use this option in case the subscription fails for any reason, in this case I did create a new Error ticket as example and after run the subscription I got the email as below with the new error ticket on the list
Add Subscription
This option allow you to create a new subscription for the same Filter, it means another groups of recipients can get a the list of tickets that meet the filter but in another schedule for example.
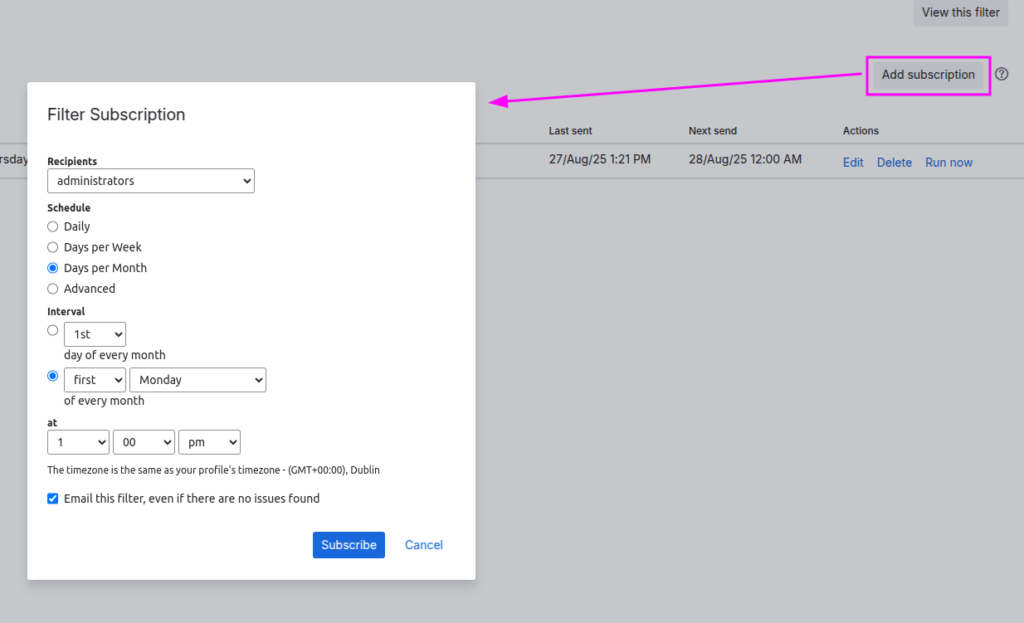
By this change, the group of Administrator will get a List of issues that meet the Filter, every first Monday of month at 1pm.
As result , you can see the new subscription on the list

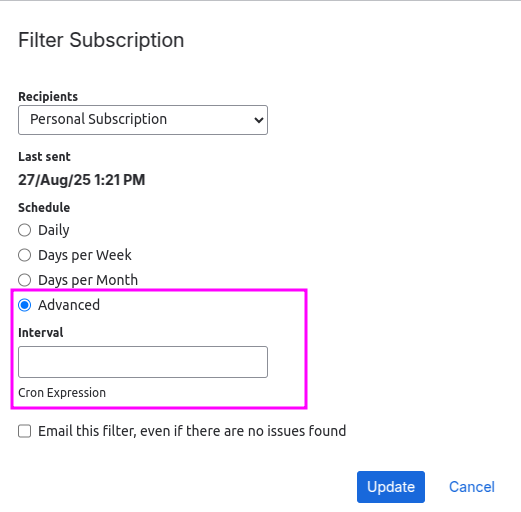
Advanced Schedule
In case the list of options to schedule the subscription does not meet your requirements, you can use this advanced option, by cron expression
On this point we need to know what is a cron expression. Cron expressions are used to configure schedule records, A cron expression is a string of 6 or 7 fields separated by whitespace. A cron expression should include a chain of values for seconds, minutes, hours, day of month, month, and day of week, the year is not mandatory.
Examples of Cron Expressions
0 0 12 * * ? = Run at 12 PM (noon) every day.
0 15 10 ? * * = Run at 10:15 AM every day.
0 15 10 * * ? = Run at 10:15 AM every day.
0 15 10 * * ? * = Run at 10:15 AM every day.
0 15 10 * * ? 2010 = Run at 10:15 AM every day during the year 2010.
0 * 14 * * ? = Run every minute starting at 2 PM and ending at 2:59 PM, every day.
0 0/5 14 * * ? = Run every 5 minutes starting at 2 PM and ending at 2:55 PM, every day.
The following table displays the fields of a cron expression, in the order that they must be specified (from left to right):
| Second | Minute | Hour | Day-of-month | Month | Day-of-week | Year (optional) | |
|---|---|---|---|---|---|---|---|
| Allowed values | 0-59 | 0-59 | 0-23 | 1-31 | 1-12 or JAN-DEC | 1-7 or SUN-SAT | 1970-2099 |
| Allowed special characters | , – * / | , – * / | , – * / | , – * / ? L W C | , – * / | , – * / ? L C # | , – * / |
Here is an example:
0 20 10 ? OCT MON 2025This literally translates to 0 second, 20 minute, 10 hour, any day of the month, October, 2025.
In plain words, this represents 8:10 pm on every Monday during October of 2025. We need to know that, the ? character means “no particular value”. In this example, we have set the Day-of-month to no particular value. We don’t need to specify it, as we have specified a Day-of-week value.
Ok, I hope this post help you to manage your subscription wisely and see how useful is this feature or Jira Software.
Comments are closed