On this post we will learn how to subscribe to a Filter that meet specific conditions and get a list of these tickets by email.
Why we need to subscribe to a filter?
Key Reasons to Subscribe to a Jira Filter
- Automated Monitoring: You don’t need to constantly check Jira for new or updated issues; the filter subscription sends you regular updates automatically.
- Critical Issue Alerts: Get timely notifications about high-priority issues or issues that haven’t been resolved within a specific time frame, ensuring quick action.
- Progress Tracking: Monitor the overall statistics or key milestones within a project to keep track of progress and identify potential bottlenecks.
- SLA Management: Ensure your team meets Service Level Agreements (SLAs) by getting updates on issues that are critical for timely resolution.
- Workload Management: Keep track of all open issues assigned to you or your team, helping to prioritize and assign tasks efficiently.
- Reporting and Metrics: Receive lists of issues on a regular basis, which can be used for reporting, team meetings, or other analytical purposes.
- Customer Support: In customer support portals, you can get email notifications for newly submitted tickets, allowing for prompt responses.
How to create a Subscription
Create the Filter
We will take this filter as example , this filter return all the “Unassigned” tickets on status “to do” and prioritised as “Highest” in fact , in a real scenario, these error tickets are very important, needs our full attention and has to be resolved immediately
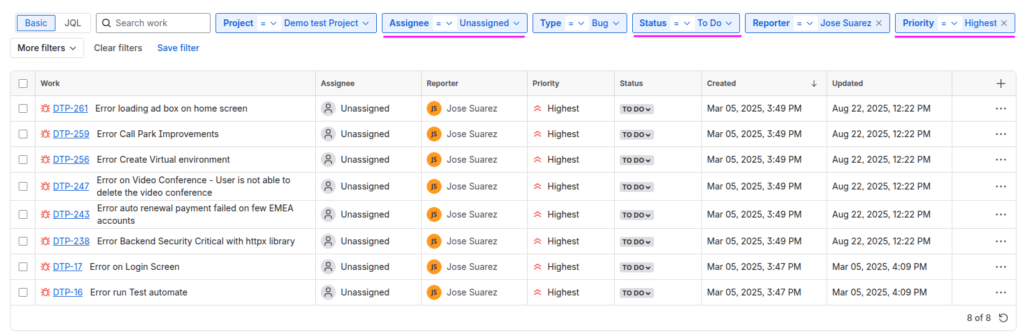
If you are familiarise with JQL the sentence is like this
project = DTP
AND reporter = @JoseSuarez
AND assignee = empty
AND priority = Highest
AND status = "To Do"
AND type = Bug
ORDER BY created DESC
Those are issues flagged by users or automated systems that need immediate attention but haven’t been formally assigned to a specific developer or team.
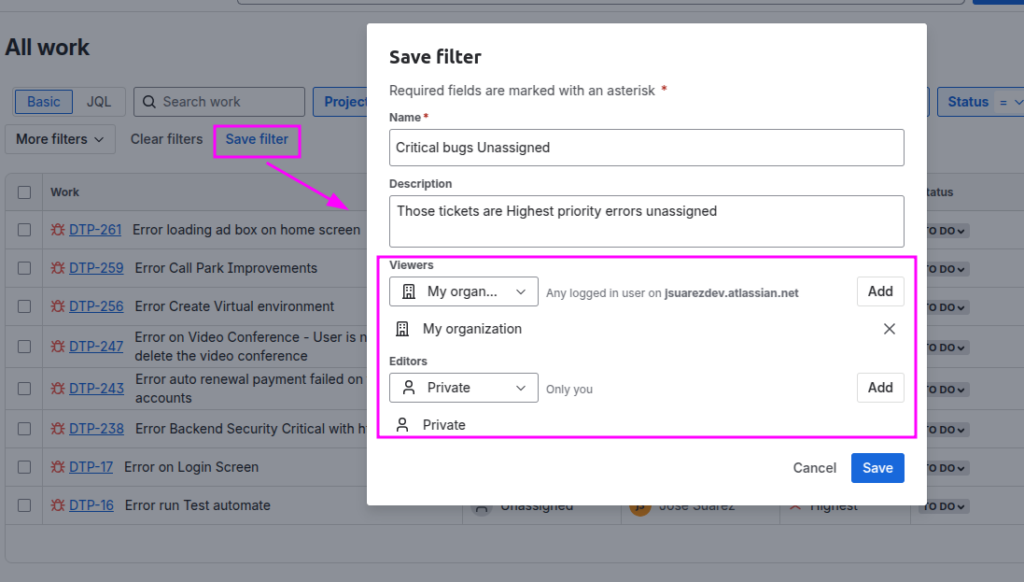
Save the Filter
Once you get the list of ticket that you meant, save the filter and pay attention to these details
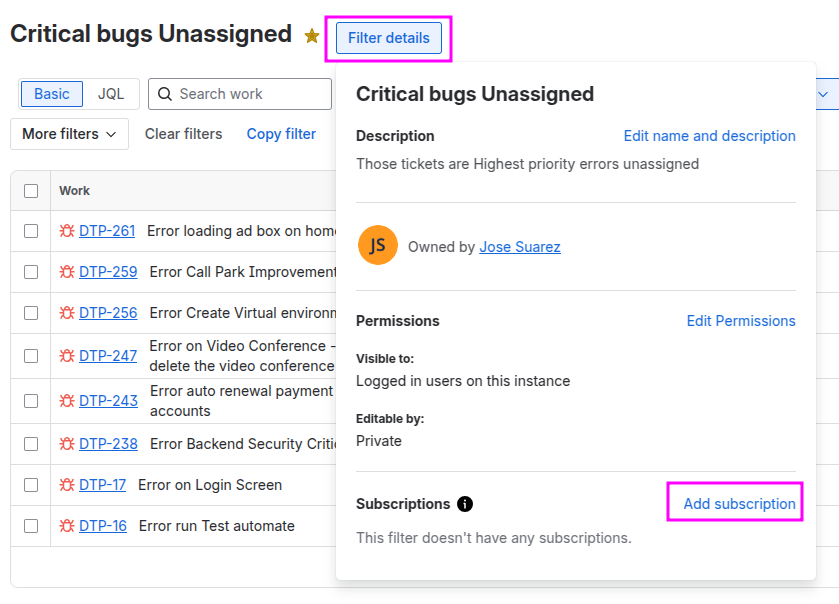
Setting subscription
Once saved the Filter, click on “Filter details” button and then click on “Add subscription”
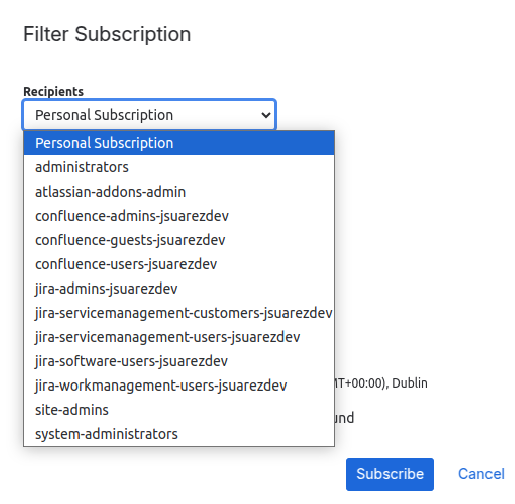
On this screen you can setting the subscription , for example what group of Users will get the report and how often it will sent.
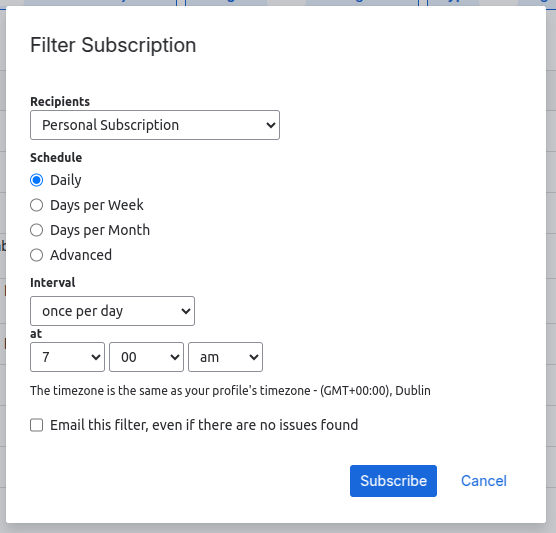
Select who will be the recipients, if is only for you, then select “Personal Subscription”
Next step, select the Schedule and Interval, it depends how often do you want to receive the report in base of how critical it be.

There is a final check box, if you want to get the email with the list even if there are not issues found, it is optional.
That should be enough to set a Subscription and you will start to get an email with list of tickets that meet the condition. like this.
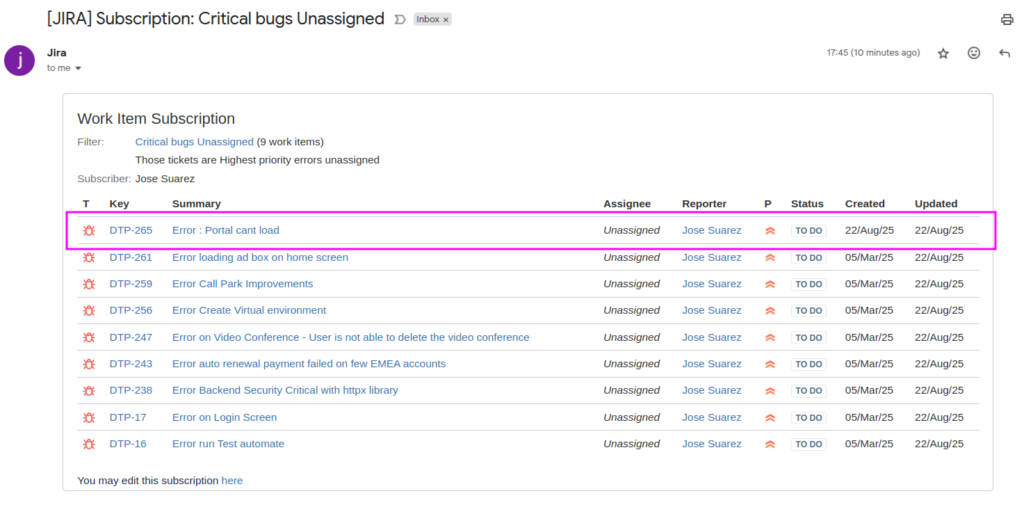
As you can see there is a new ticket on the top of the list.
Will see on later post, how to manage subscription and advanced options.
Comments are closed